⭐Must-Have Products I Use & Recommend!⭐
Personal Note
I personally use and love these products in my kitchen. I only recommend what I trust!
I personally use and love these products in my kitchen. I only recommend what I trust!


Disclosure: This post contains affiliate links. If you click and make a purchase, I may earn a small commission at no extra cost to you.
I still remember the messy joy of baking my first cake with my grandma. Flour everywhere, a sticky countertop, and giggles filling the kitchen. The end result, a slightly lopsided, but absolutely delicious chocolate cake. It wasn't perfect, but it was perfect for us. This recipe is inspired by those moments – a celebration of simple joys and creating lasting memories. My aim is to equip you with the knowledge to build a cake thats memorable. Grab your aprons, crank up your favourite tunes, and let's bake!

This isn't just a cake; it's a canvas for your creativity. Think building blocks, playful animals, sports equipment, or even a miniature version of his favorite video game character. Consider the colors, textures, and flavors that resonate with the special boy in your life, and lets incorporate those into your design. Does he love trains? How about crafting a locomotive out of fondant? Is he a budding astronaut? A celestial-themed cake might just be the thing!

The most delightful part of this project is the memories we make while baking it! Dont worry so much about precise measurements or if you accidentally forget an ingredient... remember the end goal is to celebrate a boy's milestone. Invite your child to bake along with you, making it a truly special bonding experience. These are the moments they'll cherish and remember long after the last crumb is eaten. That said though lets try not to make a mess alright... I don't wanna be cleaning cake for days after!

Required Equipments
- Mixing Bowls
- Electric Mixer
- Measuring Cups and Spoons
- 9-inch Round Cake Pans
- Wire Rack
- Spatula or Icing Knife
Boy's Milestone Marker Cake: Frequently Asked Questions
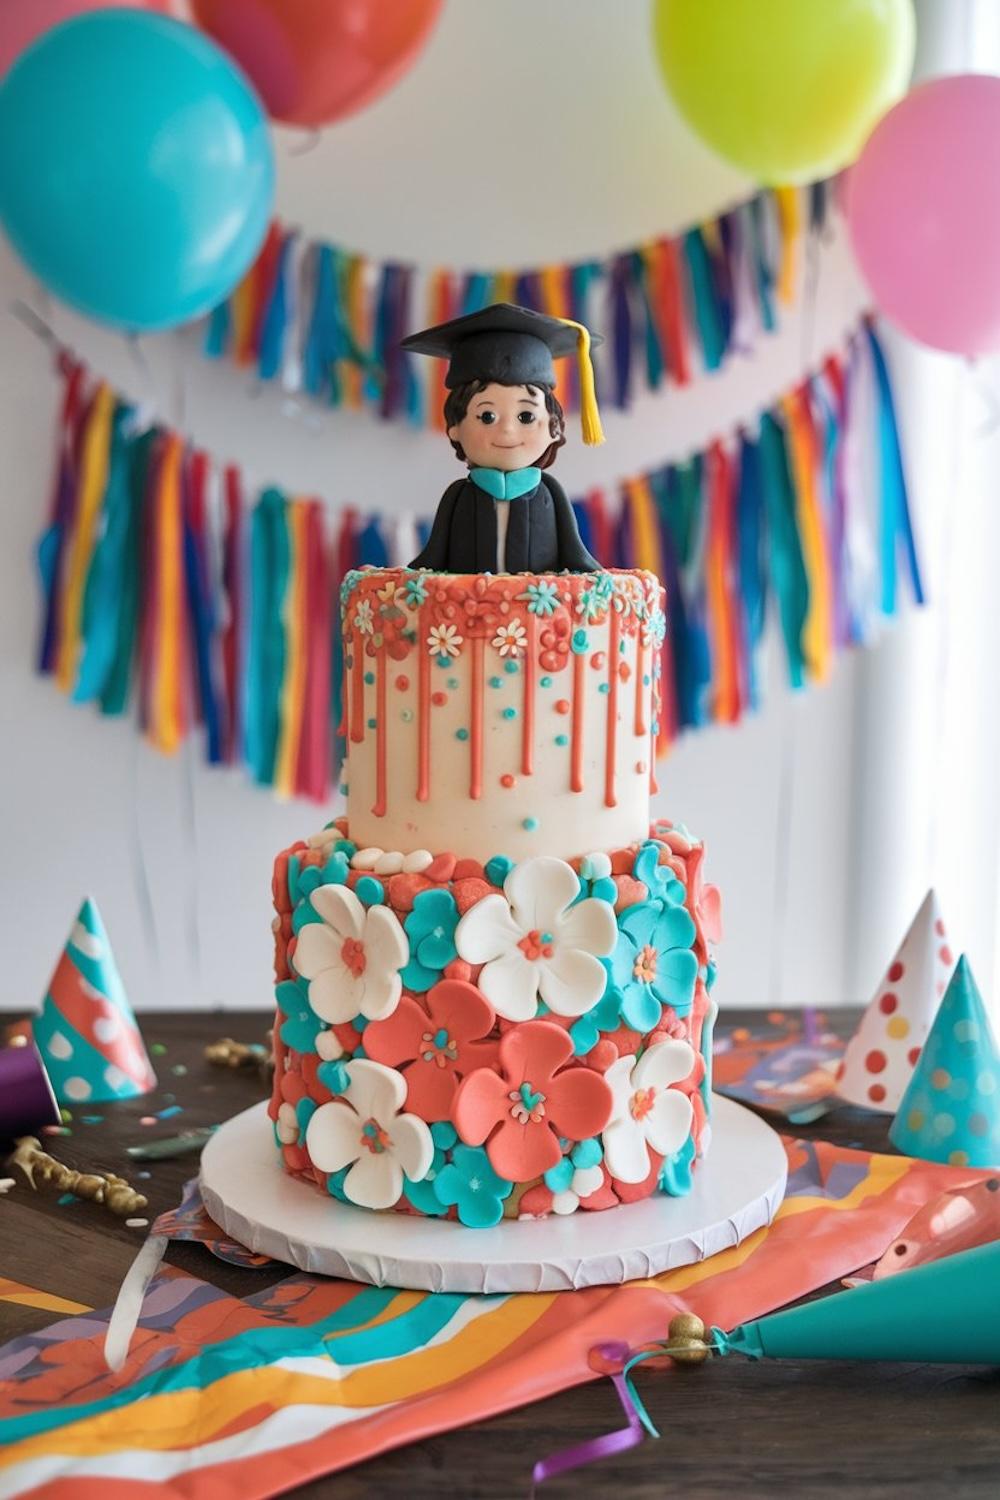
Boy's Milestone Marker Cake
Celebrate a special boy's milestones with this impressive cake, perfect for birthdays, graduations, or any achievement worth commemorating. This recipe guides you through creating a delicious and visually stunning centerpiece that captures the essence of boyhood!
⏳ Yield & Time
Yield: 12 servings
Preparation Time: 30 minutes
Cook Time: 35 minutes
Total Time:
🍽 Ingredients
📖 Instructions
- **Prepare the Cake Pans:** Generously grease and flour two 9-inch round cake pans. You can also line the bottoms with parchment paper circles for easy removal. This prevents sticking and ensures a clean release.
- **Cream Butter and Sugar:** In a large mixing bowl, cream together 1 cup (2 sticks) of unsalted butter, softened, and 2 cups of granulated sugar until light and fluffy. This usually takes about 3-5 minutes. The mixture should be pale and airy, almost like whipped cream.
- **Add Eggs and Vanilla:** Beat in 4 large eggs, one at a time, followed by 2 teaspoons of vanilla extract. Ensure each egg is fully incorporated before adding the next. The batter might look slightly curdled at this point, but don't worry, it will come together.
- **Combine Dry Ingredients:** In a separate bowl, whisk together 3 cups of all-purpose flour, 3 teaspoons of baking powder, and 1/2 teaspoon of salt. Whisking ensures the baking powder and salt are evenly distributed throughout the flour.
- **Alternate Wet and Dry Ingredients:** Gradually add the dry ingredients to the wet ingredients, alternating with 1 cup of milk. Begin and end with the dry ingredients. Mix until just combined. Be careful not to overmix, as this can result in a tough cake. A few streaks of flour are okay at this point.
- **Divide and Bake:** Divide the batter evenly between the prepared cake pans. Bake in a preheated oven at 350°F (175°C) for 30-35 minutes, or until a wooden skewer inserted into the center comes out clean. The cakes should be golden brown and spring back lightly when touched.
- **Cool the Cakes:** Let the cakes cool in the pans for 10 minutes before inverting them onto a wire rack to cool completely. Cooling them upside down helps to even them out. Make sure they are completely cool before frosting.
- **Make the Frosting:** In a large mixing bowl, beat 1 cup (2 sticks) of unsalted butter, softened, until smooth and creamy. Gradually add 4 cups of powdered sugar, beating on low speed until combined. Add 1/2 cup of milk and 2 teaspoons of vanilla extract. Increase the speed to medium and beat until light and fluffy, about 3-5 minutes. If the frosting is too thick, add more milk, 1 tablespoon at a time.
- **Level the Cakes (Optional):** Use a long serrated knife to level the tops of the cakes, if necessary. This will ensure a flat and even surface for frosting.
- **Assemble the Cake:** Place one cake layer on a serving plate or cake stand. Spread a generous layer of frosting over the top. Place the second cake layer on top of the frosting. Frost the entire cake with the remaining frosting. Get creative with your spreading, swirls and peaks make the presentation more interesting!
- **Decorate:** Now comes the fun part! Decorate the cake with your choice of toppings. Fondant shapes, sprinkles, edible glitter, candies, and even small toy figures can be used to create a unique and personalized milestone marker cake. Let your imagination run wild!
- **Chill and Serve:** Refrigerate the cake for at least 30 minutes to allow the frosting to set before serving. This will make it easier to slice and prevent the layers from sliding.
- **Optional Extra Touch:** Drizzle with chocolate ganache or caramel sauce for added flavor and visual appeal. You can even add fresh berries or chopped nuts around the base of the cake.
📝 Notes
- For a chocolate cake, add 1/2 cup of cocoa powder to the dry ingredients.
- You can use different extracts for different flavors, such as almond or lemon.
- Store leftovers in an airtight container in the refrigerator for up to 3 days.
🍎 Nutrition
Calories: 450 kcal
Protein: 5 g
Fat: 20 g
Carbohydrates: 65 g
Fiber: 1 g
Calcium: 50 mg